

Image quality checklist: Is your photo ready for print?
When self-publishing a book of your photography, excellent image quality is crucial. Your photos are the star of the show and what will make or break the final printed product. Unlike digital images that you can easily adjust, once you print your book, there’s no going back. Reviewing and optimizing each image carefully will make all the difference in having a book you’re proud to share.
As experts in self-published photo books, we’ve seen it all when it comes to image quality—the good, the pixelated, and the blurry. To help you get the best print result, we gathered the top tips from Blurb’s printing experts, Dan Milnor and Michael Y., and created this comprehensive checklist.
Why image quality is crucial
With self-publishing, you fully control the final product, from the images to the layout to the paper selection. This is both liberating and daunting, as you have the final say but also need to catch all issues. Here are the top reasons it matters:
- Your images are your book. The photos are the main content and focal point of a photography book. Even minor issues will be glaringly apparent in print.
- Print is less forgiving than digital. An image that looks okay on screen may reveal all sorts of flaws when printed at full size. There’s nowhere for imperfections to hide.
- It’s permanent. Unlike a social post or web portfolio where you can always update an image, once you print your book, that’s it. You want to get it right the first time.
Checklist for print-ready images
Ready to get to the checklist? We are, too. Here’s where you should start to replicate your vision in print flawlessly.
Calibrate your monitor
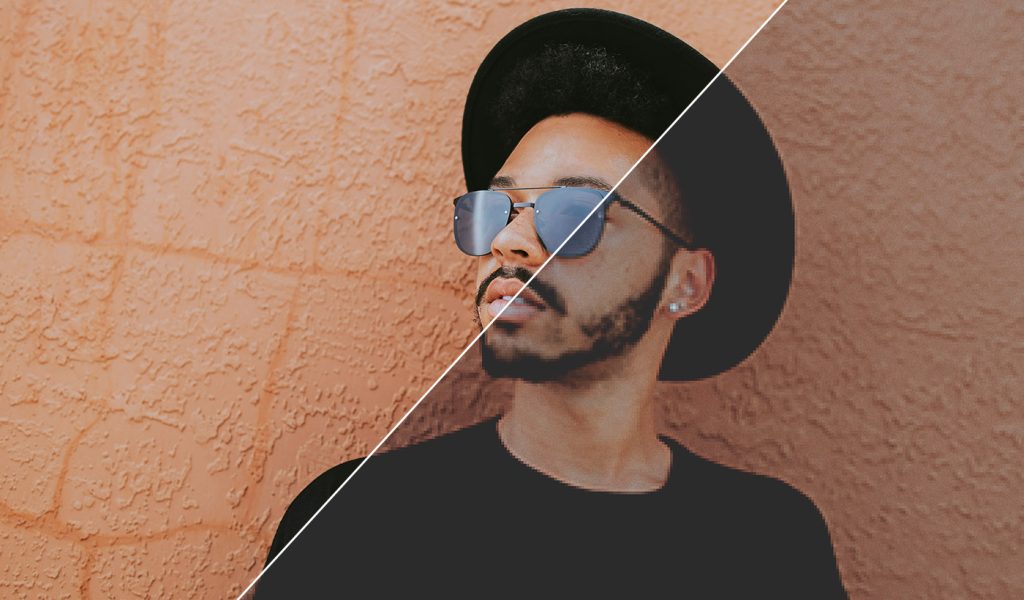
You’ve spent hours editing your images to perfection, but if you didn’t calibrate your monitor, all that work might be for naught. Colors can vary significantly between screens, so invest in a color calibration tool to ensure that what you see is what you’ll get in print. This will help you achieve a more accurate representation of your images and avoid any surprises when your book arrives.
A tip from Dan: The number of pros who don’t calibrate is astoundingly high. Don’t be like them. Get a calibrator, fix your monitor, and see your work as it is.
Check your resolution
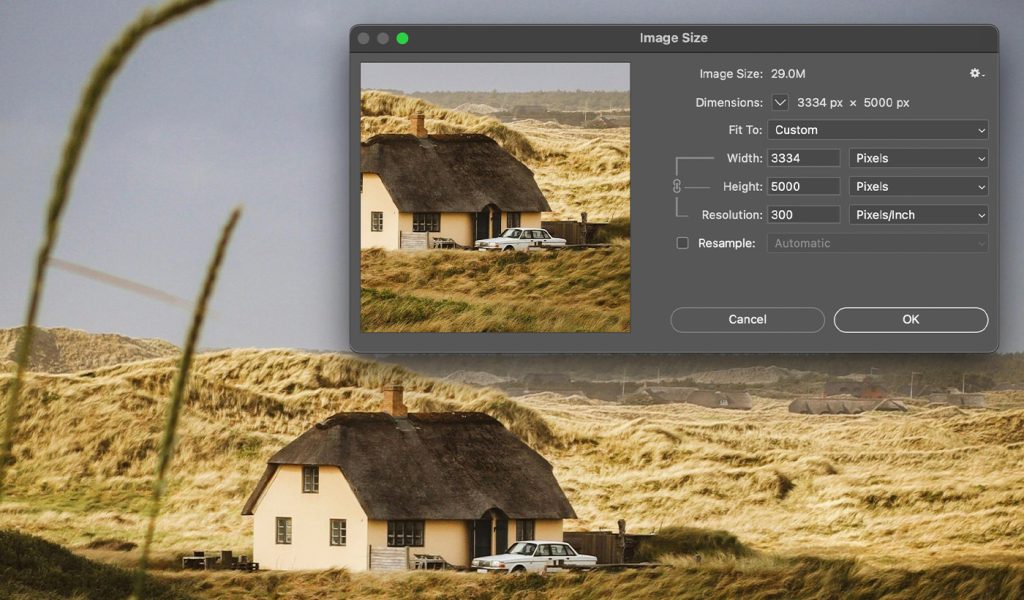
When it comes to print, resolution matters—way more than it does digitally. Aim for a photo resolution for printing of 300 PPI (pixels per inch) for sharp and detailed images. Dan’s trick is simply sizing all of his images at 5,000 pixels for the longest side. He’s never had an issue, even with a double truck spread in his largest landscape book.
The low-resolution warning in Blurb’s free bookmaking software BookWright can also help flag images that won’t print well. Aim to use your photos at 100 percent print size or smaller. Remember that you can always downsize an image, but enlarging a low-resolution photo will result in a blurry or pixelated eyesore. Shoot high-res from the start and resize as needed.
Import images as JPGs
When importing your images into BookWright or any other layout software, we generally recommend JPG format. JPGs strike a good balance between image quality and file size, making them suitable for printing.
A tip from Michael: When scanning content—like old printed photos, newspaper clippings, or old letters—scan and save your content as high-resolution TIFFs first. You can always convert them to PNG files later, to use in BookWright. Just don’t scan and save everything in a lossy format like JPGs or, worse, low-resolution JPGs. You might have to start over and rescan everything.
Convert color mode from RGB to CMYK
RGB (red, green, blue) is the color mode used for digital displays, while CMYK (cyan, magenta, yellow, black) works best for high quality image printing. To ensure accurate color reproduction, convert your images from RGB to CMYK before sending them off to print. Note that some colors may appear more muted in CMYK, so adjust accordingly.
A tip from Michael: Before you edit your images, like changing the color mode or following any suggestions below, duplicate them first. Edit the duplicates and leave the originals alone. That way, you’ll have the original, unedited image for other purposes.
Brighten your images
Images tend to print darker than they appear on screen, so it’s a good idea to brighten them slightly before sending them to print. And slightly is the operative word there—you don’t want to blow out your highlights or lose detail in the shadows. A good rule is increasing brightness by about 10 to 15 percent.
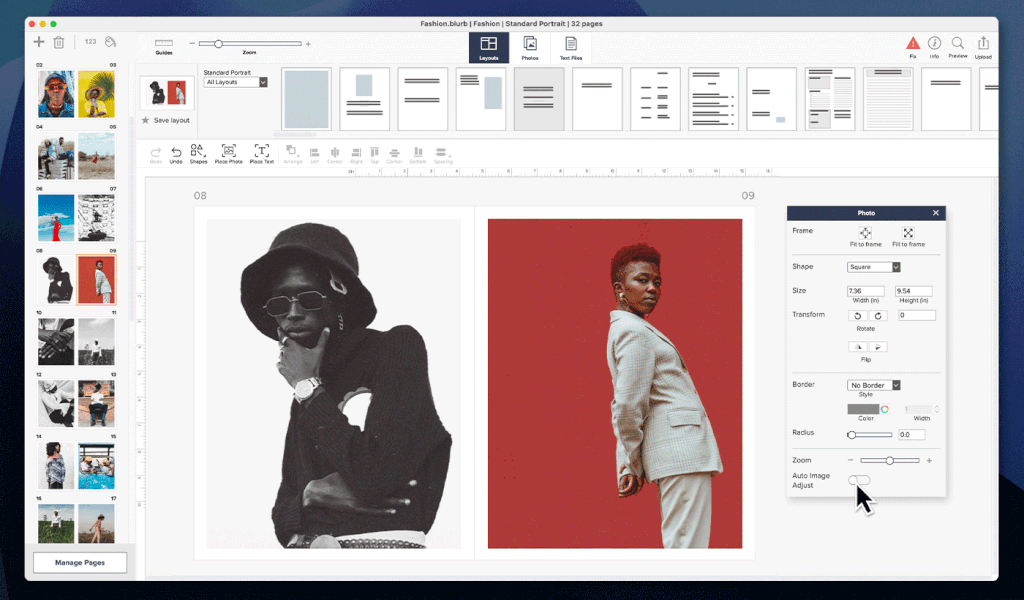
A tip from Dan: Toggle on the Auto Image Adjust button in BookWright. It’s a great gauge of how the software sees your photos—and can adjust images that are dark or contrasted. From there, you can either use the auto-adjusted image, turn it off if you don’t like the results, or go back and edit the original photo if you need more customized adjustments.
Slightly sharpen
Just as images tend to print darker, they also tend to appear softer in print than they do on screen. To compensate for this, apply a small amount of sharpening to your images. But just as with brightness, less is more. Over-sharpening can create harsh edges and artifacts, so use a light touch.
A tip from Dan: Digital cameras and modern lenses are so good there is very little you need to do. Just sharpen a tiny bit—don’t go overboard. (And note that BookWright’s Auto Image Adjust feature will slightly sharpen your photos.)
Adjust levels and curves
Levels and curves are powerful tools for adjusting your images’ tonal range and contrast. By fine-tuning the shadows, midtones, and highlights, you can make your images pop and ensure they translate well to print. Just be careful not to clip your blacks or whites, as this can result in lost detail.
Ensure consistent color and exposure
It’s important to maintain a consistent look and feel when working on a series or collection of images. Make sure that your color grading and exposure are cohesive across all of your images. This can create a more professional end product.
A tip from Dan: I always order a single copy as a proof to make sure all my images look cohesive. If one or two look off, I double-check them. If all have a color cast, I contact Blurb’s customer support to see how I can fix it.
Remove blemishes
Unless you want to show dust spots, sensor smudges, or other imperfections in your images, fix them ahead of printing. Take the time to carefully remove any blemishes using cloning or healing tools. This will ensure your final photo prints are as clean and polished as possible.
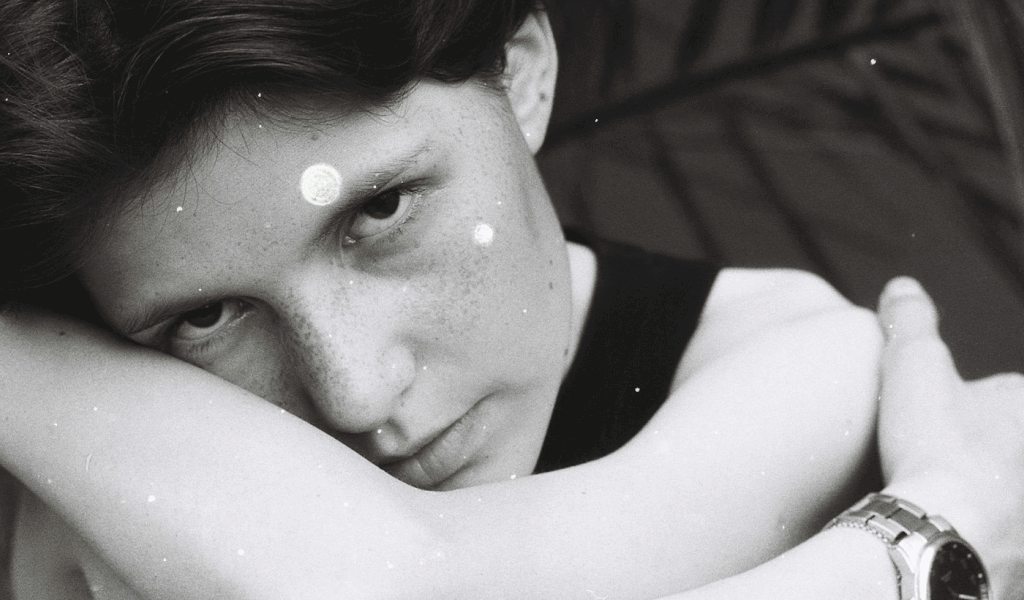
Check for noise or artifacts
Noise and artifacts can be especially noticeable in print, particularly in large areas of solid color or shadow. Before printing, zoom in on your images and check for any distracting noise or weird artifacts (see our next tip). If necessary, use noise reduction or editing tools to clean things up.
Crop and straighten
Before sending your images to print, take a final look at the composition and make any necessary adjustments. Crop out any distracting elements or unwanted negative space, and make sure your horizons are straight. A well-composed image will have a stronger impact on the page.
Zoom in to 200 percent
One of the best ways to check the quality of your images is to zoom in to 200 percent. This will allow you to see any imperfections or issues that may not be noticeable at a smaller size. Recheck your photography for pixelation, sharpness, noise, and other artifacts that could be problematic in print.
A tip from Michael: Use your image viewing or editing program to zoom to 200 percent. If you see any issues at this size, you’ll see the same thing in print. (And if you’re using Blurb’s PDF Uploader or the Blurb plugin for Adobe InDesign, you’ll still have a chance to zoom in Acrobat before uploading).
Mind your bleed
If you want your images to extend to the edge of the page, include a bleed on all sides. This will ensure that there are no white borders around your images after trimming.
A tip from Dan: Luckily, in BookWright, you have pink trim lines to help guide you. If you’re printing a full bleed image, you need your photos to go past the red-dotted trim line and all the way to the outer edge of the pink-shaded area.
Print a proof
Before committing to a full print run, ordering a single copy is always a good idea. This will allow you to see how your images translate to the physical page and make any necessary adjustments. It’s much better to catch any issues early on than to end up with a whole batch of books that don’t meet your standards. Trust us; it’s worth the extra time and cost to get it right.
A tip from Michael: Some people print their book on their home printer before they order a copy. But unless you’ve got an HP Indigo squeezed into your home, your printer will use different papers, inks, and print settings—and potentially look a lot different than your final book.
Troubleshooting common issues
Even with careful preparation, certain image quality issues can sneak in. Here’s how to identify and resolve the most common offenders:
- Too dark. Underexposed or shadowy photos can turn into muddy blobs in print. Boost brightness, adjust levels, and tweak contrast to lighten them up.
- Soft images. Photos that are out of focus, affected by camera shake, or low resolution will look blurry and soft in print. Sharpen them slightly, but know that this can only help so much—you can’t fully fix a blurry photo. Re-shoot if needed.
- Graininess. High ISO noise or excessive digital manipulation can leave photos looking grainy and stippled, especially in areas of solid color, like skies. Apply noise reduction, but use a light touch to avoid degrading essential details.
- Cropping too tightly. Avoid cropping your photos too close to important elements. Leave breathing room and padding around the edges as a safety area in case of any slight variance in trimming.
- Unexpected border. If your images don’t extend to the edge with a bleed area, you may have unsightly white borders around them after trimming. It’s easy to fix; just extend your image to the bleed line.
- Color casts. An unwanted tint or color cast across your images can detract from the printed quality. Use color correction tools to neutralize and remove color casts.
- Clipping. If you’ve inadvertently clipped black or white areas during editing, you’ll lose important shadows or highlight details in those areas when printed. Use the levels or curves adjustment tools in your image editing software to carefully adjust the tonal range and bring back detail in the clipped areas.
Final pre-print steps
You’re the homestretch now—a few last checks before you print your full run or put it up for sale:
- Review your file carefully. Once you complete your layout, give it a total check. If you’re using Blurb’s PDF Uploader or the Blurb plugin for Adobe InDesign, give the final exported PDF the 200 percent zoom test. This will show you exactly what the printer will receive.
- Order and review a proof copy. Yes, we already said this, but it bears repeating. We’ve seen large orders with typos or people’s heads trimmed off. You may think of a single proof copy as an extra expense, but it’s your insurance policy against heartbreak.
Advanced tips
If you follow the checklist above (especially if you print a proof), you should have a fantastic self-published book full of images you’re proud of. But if you want to go the extra mile, here’s what you must do:
- Start a DAM (digital asset management) system. Create a system and stick to it. Dan uploads images after each shoot, keywords them, and uses a star ranking system to curate as he goes. Being organized saves him so much time during the bookmaking process!
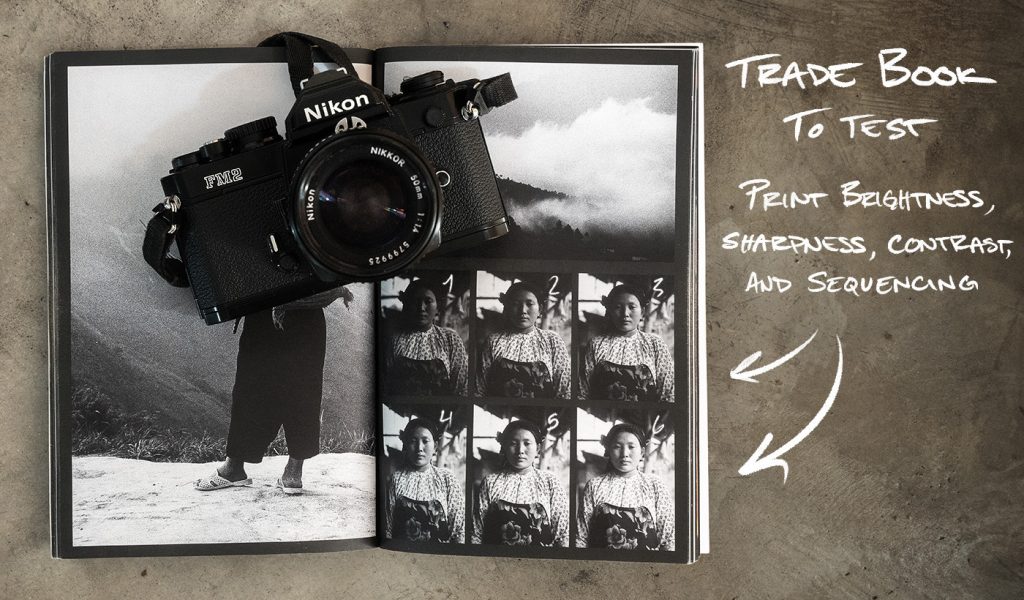
- Print test books. Dan’s top tip is to print softcover test books. Print a range of your work (color, black and white, toned black and white) on your top paper choices. Different papers’ texture, coating, weight, and finish can drastically alter the way colors and details are rendered—and how you edit your whole book.
- Consider soft proofing. Before committing to an entire print run, use soft proofing tools in Photoshop, using Blurb’s color management workflow. These can simulate how your images will look when printed using specific printer profiles and rendering intents, giving you a preview of potential issues.
- Embrace new upsampling features (with caution). New AI-powered upsampling tools like Adobe’s Super Resolution can possibly intelligently enlarge images while preserving the highest quality. Test them out if you’re in a pinch, but know they’re no substitute for capturing high-res photos.
Ready. Set. Print!
You’ve made it through the checklist, mistakes, pre-press, and advanced tips—now it’s time to put your knowledge into action and finally create that book! And there’s honestly nothing better than holding your work reproduced with breathtaking quality on the printed page.
Don’t forget to share your creations with us via social media. Just use #BlurbBooks or mention us @BlurbBooks. You’ve got this!
***
At Blurb, we’re here to help you publish professional-quality photography books with ease. Our free Blurb BookWright software makes designing your book a snap, even if you’re not a designer. It has an auto-image adjust feature, checks for low-resolution images, and offers built-in color soft proofing—saving you from surprises.
Ready to take the leap? Create your Blurb account today, and let’s get started. With care and attention to image quality, you’ll soon have a photo book you’ll be proud to share with the world. Your images deserve it!